I'm so happy to say I finished my OMG!!!! Early in fact! I also took the time to take photos so I could give a tutorial on binding a quilt. I know, I know there are so many tutorials out there but It seems to be the one thing that people are looking for the most. And since I don't put binding on near enough to remember, having it posted here will help me find it easier!!! 😆
Here is my finished Out Of This World Quilt bound and ready for college!
Check others finishes by heading to Elm Street Quilt!

From the very first quilt I made I have done the binding with a flange, extra color is always a good thing!!! It's also done with the sewing machine...no hand sewing! I'm not good at hand sewing (but I'm working on it this year!) and I want to get the quilts done as fast as possible so I can get on with the next one!
I had the binding already done so I don't have photos of the making of that, but it's two strips the wider one is the flange color and the narrow is the binding. The flange is 1 3/4" and the binding is 1 3/8" sewn together the length of the strips. Iron the flange up to the outer binding. Fold your binding, wrong sides together and have the raw edges line up, iron to give it a crease and hold the fold. Your flange should be peeking out when looking at the top of the binding.

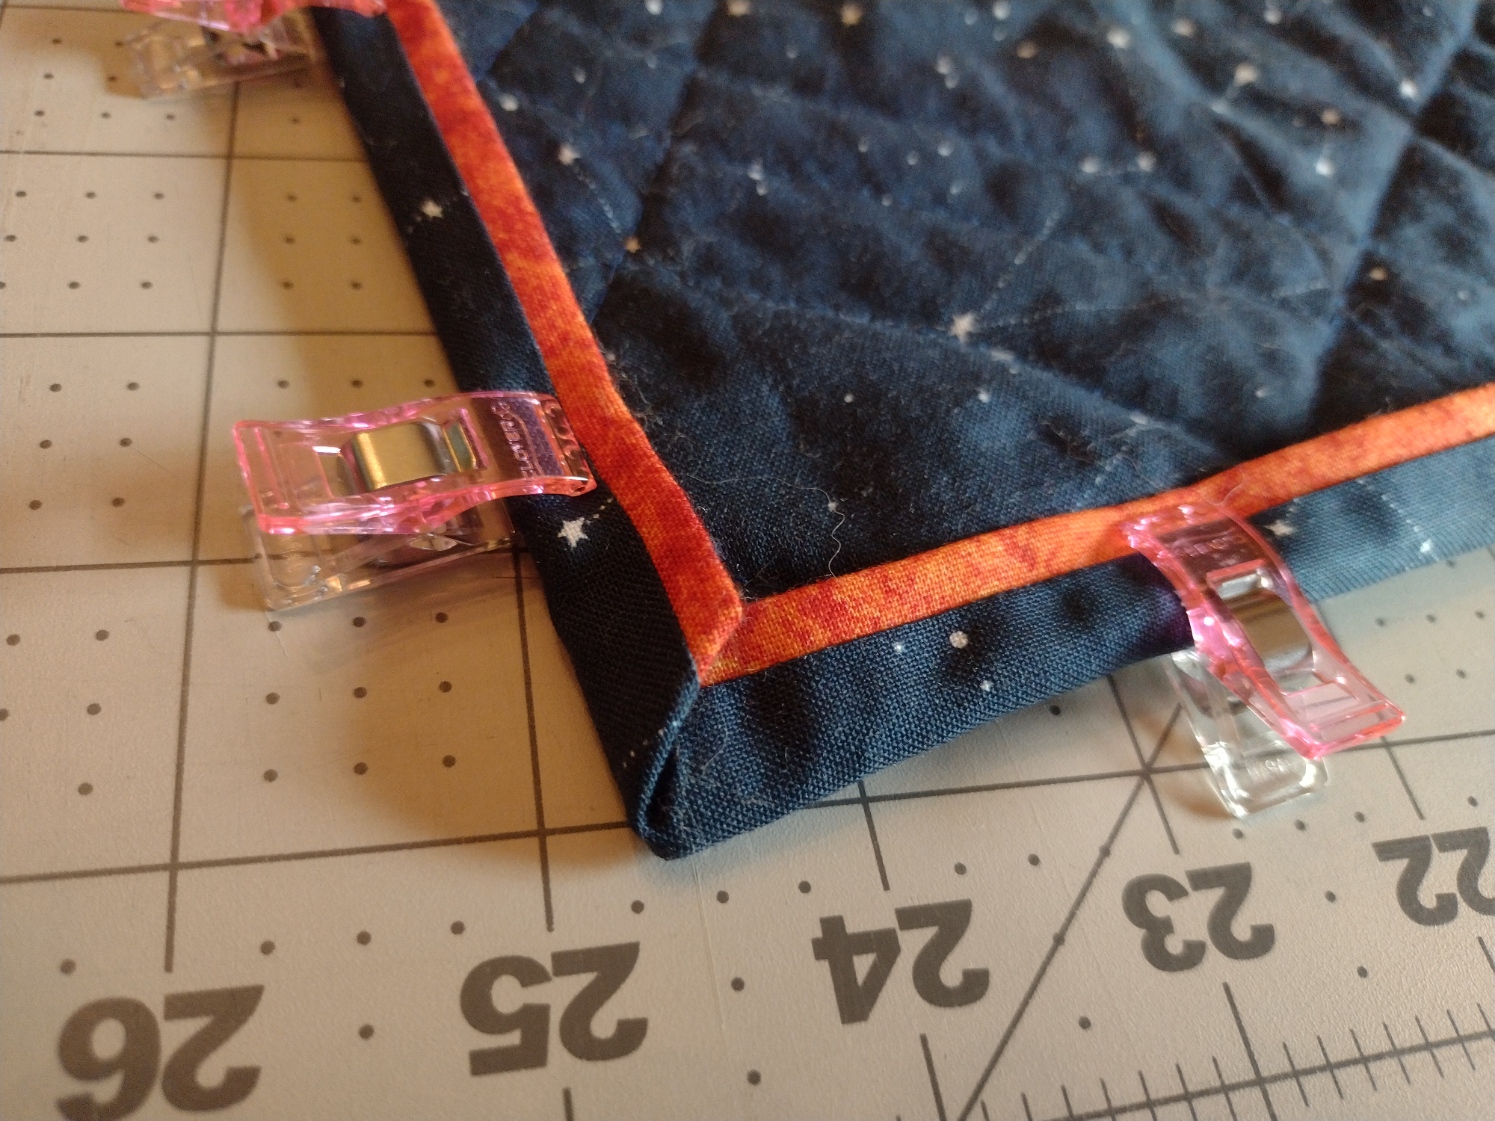
The dark blue fabric is the outer part of my binding and the orange is the flange.

Starting at the middle edge of the quilt and having a tail of about 8" to 12" of the binding free (you'll need it to attach it to the other end) lay the outer part of your binding (raw edge) to the backside raw edge of your quilt. What you see is the flange and the back of my quilt. I use clips to hold it all the way around the quilt.

At the first corner (actually all the corners!) you fold the binding so that it is even with the edge of the quilt and crease the 45 degree fold.
Then you fold it back so that the next fold is even with the first edge of the quilt.

See how it the binding follows the quilt>>>
Below I show how I use the clips to hold the corner in place.
Continue around the quilt doing the other 3 corners the same way.
With the binding clipped on and having a gap between where you started and ended attaching the binding, about 12" you should have extra binding on both ends. Starting around where the clip is, sew the binding to the quilt using 1/4" seem allowance and back stitch in the beginning and end. Remember don't sew the gap to give you room to work on attaching the ends.
 Now here is the part that I need a refresher every time I bind a quilt! Attaching the ends!!!
Cut a section off (it doesn't have to be very big). We are going to use the piece to give us the width of the binding and help connect the ends.

Lay the tails of the strips over each other (the bottom strip is peaking out to know where it is) and unfold the piece you just cut off. Place it vertically (notice the fold) over the two strips.>>>
One end of the piece will line up with the bottom strip that is peaking out.

You will cut the top strip where the other end of the piece is...Be sure to cut the top strip and not the bottom!

<<<Here is the binding after cutting the strip. The cut piece is laying on top to the right.

Unfold the binding end and fold the one end 45 degree so that the top corner folds down to the edge. Finger press to make a crease. Notice that your outer binding is the small triangle at the top.

Open up the binding ends and pin the top flange corner to the top main binding corner, right sides together.

To make sure you have it right before sewing, pin along the crease and open. The binding should line up.
 I use clips to hold the binding in place.
Sew along the crease. Notice you are sewing like you sewn your binding together. If you see the binding is forming an "A", you are sewing the line that crosses the A! 
Notice the bottom corner is following the center line of the 1/4" washi...This stuff works great! I love it for HST!!!
The "A" is crossed! The other crease you see is when I did it wrong! Thank goodness I pinned first and fixed my mistake before sewing!!!!

Fold the binding back together and check that the flange is lined up and the binding fits against the quilt.

<<< I love when the flange lines up!!!

Unfold the binding again...

it's safe to cut the excess off.

Then open seam and iron flat.

Lay flat against the quilt and continue/finish sewing the binding down.

Fold the binding over to the front of the quilt, clipping it down as you go around. You want the binding to be right up against the edge of the quilt.
To miter the corner fold flat past the corner.

Then finger press the other side over to give the nice finished corner. Clip to hold it in place.
Continue around until it's all folded over and ready to sew down.

Your top thread should match the flange color and the bobbin should match your backing. I'm using Aurifil #2277 Light Red Orange on top and #2783 Medium Delft Blue in the bobbin.

You will stitch on the flange close to the outer binding. On this quilt the flange is the orange and the blue to the right is the outer binding.

Sew all the way around until you come to the beginning.

And you are done!!! On to the next project! who am I kidding, I have several going at a time! Doesn't everyone!!!
I hope you find this technique useful! I would love to hear how you do yours and if you ever tried to do it all by machine.
This is the You Tube video I watch when I try and remember how to join the binding...
https://www.youtube.com/watch?v=P1srfubwAIQ&list=PLGlIVNYaoGssyqUp9ZHIiUmQBCei_J1XO&index=7
Thank you for visiting and I hope to see you again!
Sheila
Great idea, Sheila--do a flange binding every time! That way it's all done by machine and yes, I do love the extra bit of color!!!
ReplyDeleteWhat a beautiful quilt that its! Thanks for an excellent tutorial for a beautiful finish for a quilt. I've only attached one flange, and it was difficult for me, and it "curled", so I should have seen this first - lol!
ReplyDeleteQuilt looks amazing! Thanks for linking up with Elm Street Quilts One Monthly Goal and congrats on your finish.
ReplyDelete